Boutique Baby Burp Cloth Tutorial, Pt. 1
You've seen these in all the pricey shops. They typically have machine embroidery or chenille on them. When my now 6-yo was a baby, I got one that merely had a strip of chenille trim sewn on the bottom edge. I'm sure my friend paid a lot of money for it.
Supply list:
Prefold diapers
Fabric scrap (at least 1/8 of a yard)
Sewing machine
Basic sewing supplies (thread, scissors, marker, ruler, iron)
NOTE: You can use any kind of trim (rick rack, grosgrain ribbon are popular), but make sure it's machine washable, because these items will be heavily laundered.
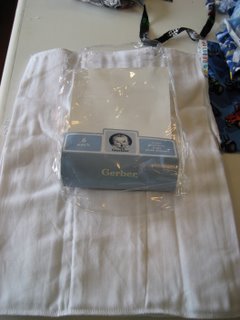
Here's how to make them. Start with some Gerber prefolds (I found these at Target).
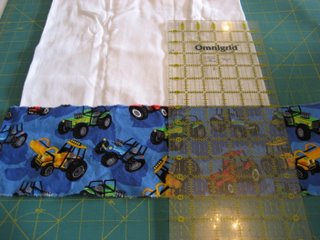
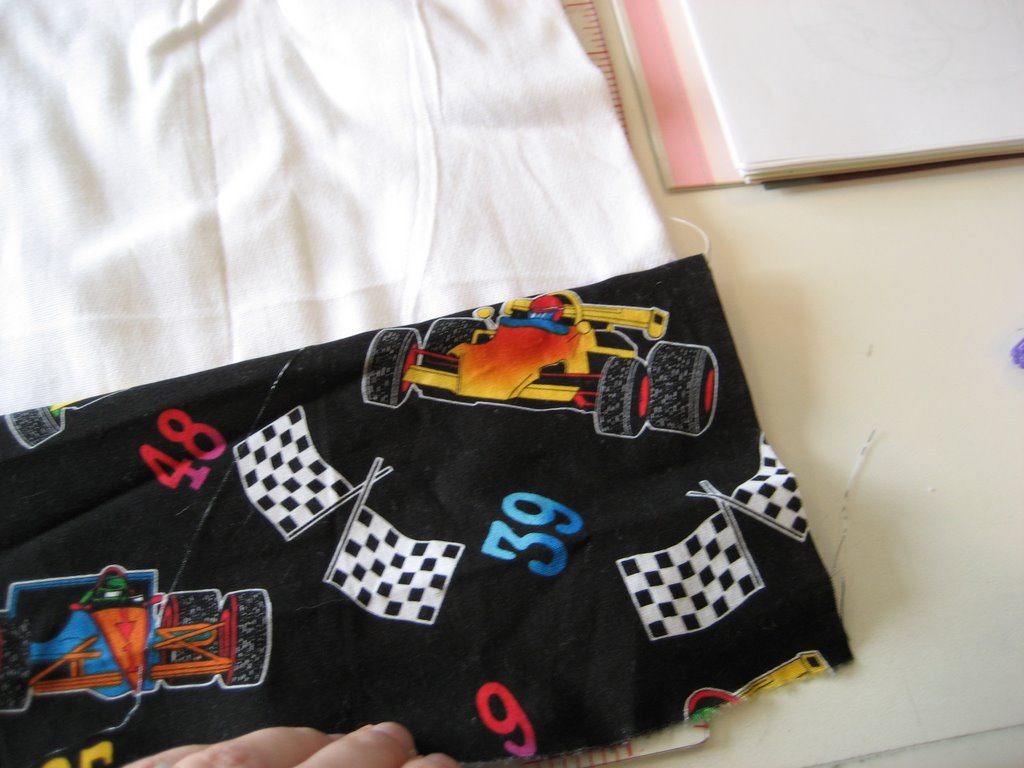
Decide how wide your border needs to be, based on the size of your print. If you are using a tiny print, you could make bias tape from it and sew that on instead. . . I decided I needed at least a two inch border with all 3 fabrics I'm using here, since the motifs were fairly large. I made them 5 inches (2 inches for each side plus 2 1/2 inch seam allowances) by 17 1/2 inches. Just make sure that your final cut strip is about an inch longer than your diaper's width.

Here I am marking the sewing line, 2 inches from the edge. Next, I drew a second parallel line 1/4 further toward the bottom edge and lined up the fabric edge there for sewing. Note that I initially intended a 1/2 inch seam allowance, but the turn of the cloth demands that you lose some of it (these diapers are thick).

Here is the two inch border strip sewn on.
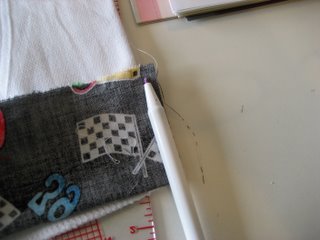
Now I'm folding up the end of the strip to sew it. You will be sewing along the edge starting where the marker is pointing, parallel with the marker, folding the diaper up out of the way.
Cont'd. . .
Supply list:
Prefold diapers
Fabric scrap (at least 1/8 of a yard)
Sewing machine
Basic sewing supplies (thread, scissors, marker, ruler, iron)
NOTE: You can use any kind of trim (rick rack, grosgrain ribbon are popular), but make sure it's machine washable, because these items will be heavily laundered.

Here's how to make them. Start with some Gerber prefolds (I found these at Target).
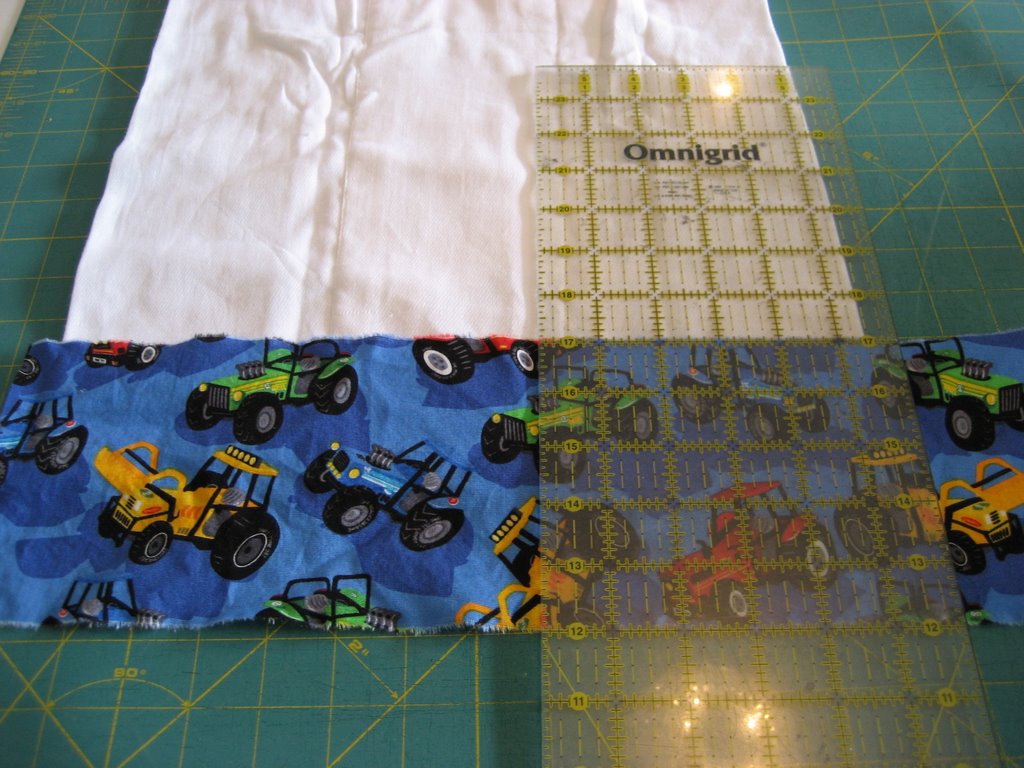
Decide how wide your border needs to be, based on the size of your print. If you are using a tiny print, you could make bias tape from it and sew that on instead. . . I decided I needed at least a two inch border with all 3 fabrics I'm using here, since the motifs were fairly large. I made them 5 inches (2 inches for each side plus 2 1/2 inch seam allowances) by 17 1/2 inches. Just make sure that your final cut strip is about an inch longer than your diaper's width.

Here I am marking the sewing line, 2 inches from the edge. Next, I drew a second parallel line 1/4 further toward the bottom edge and lined up the fabric edge there for sewing. Note that I initially intended a 1/2 inch seam allowance, but the turn of the cloth demands that you lose some of it (these diapers are thick).
Here is the two inch border strip sewn on.

Now I'm folding up the end of the strip to sew it. You will be sewing along the edge starting where the marker is pointing, parallel with the marker, folding the diaper up out of the way.
Cont'd. . .
posted by Mary B at 10:43 PM
![]()


1 Comments:
thank you so much for sharing!!! I'm going to try your burp cloths, its such a cute idea, thank you! : )
Post a Comment
<< Home